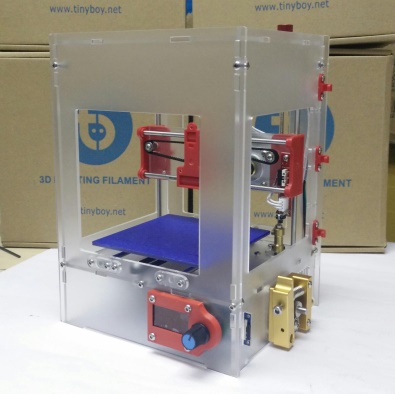
TinyBoy 2 Lite (Beta) Version Assembly Guide version 0.99
 Thanks Idea Maker HK on contributing this assembly Guide.
Preparation


Please take off the protect stickers.
The sand surfaces are the front of the plate.

We have 3 pack of screws, nuts and washers. The left one is the 3mm long screws, the middle one is all the other kinds of screws, and the right one is the nuts and washers.

It is better to set up a good place while building your machine.


The following is the sequence for the machine building.
For the TinyBoy 2 J10, it doesn't include the Display & SD card modules, but you can buy the modules separately. If you need the Display & SD card modules, please ask for your suppliers.


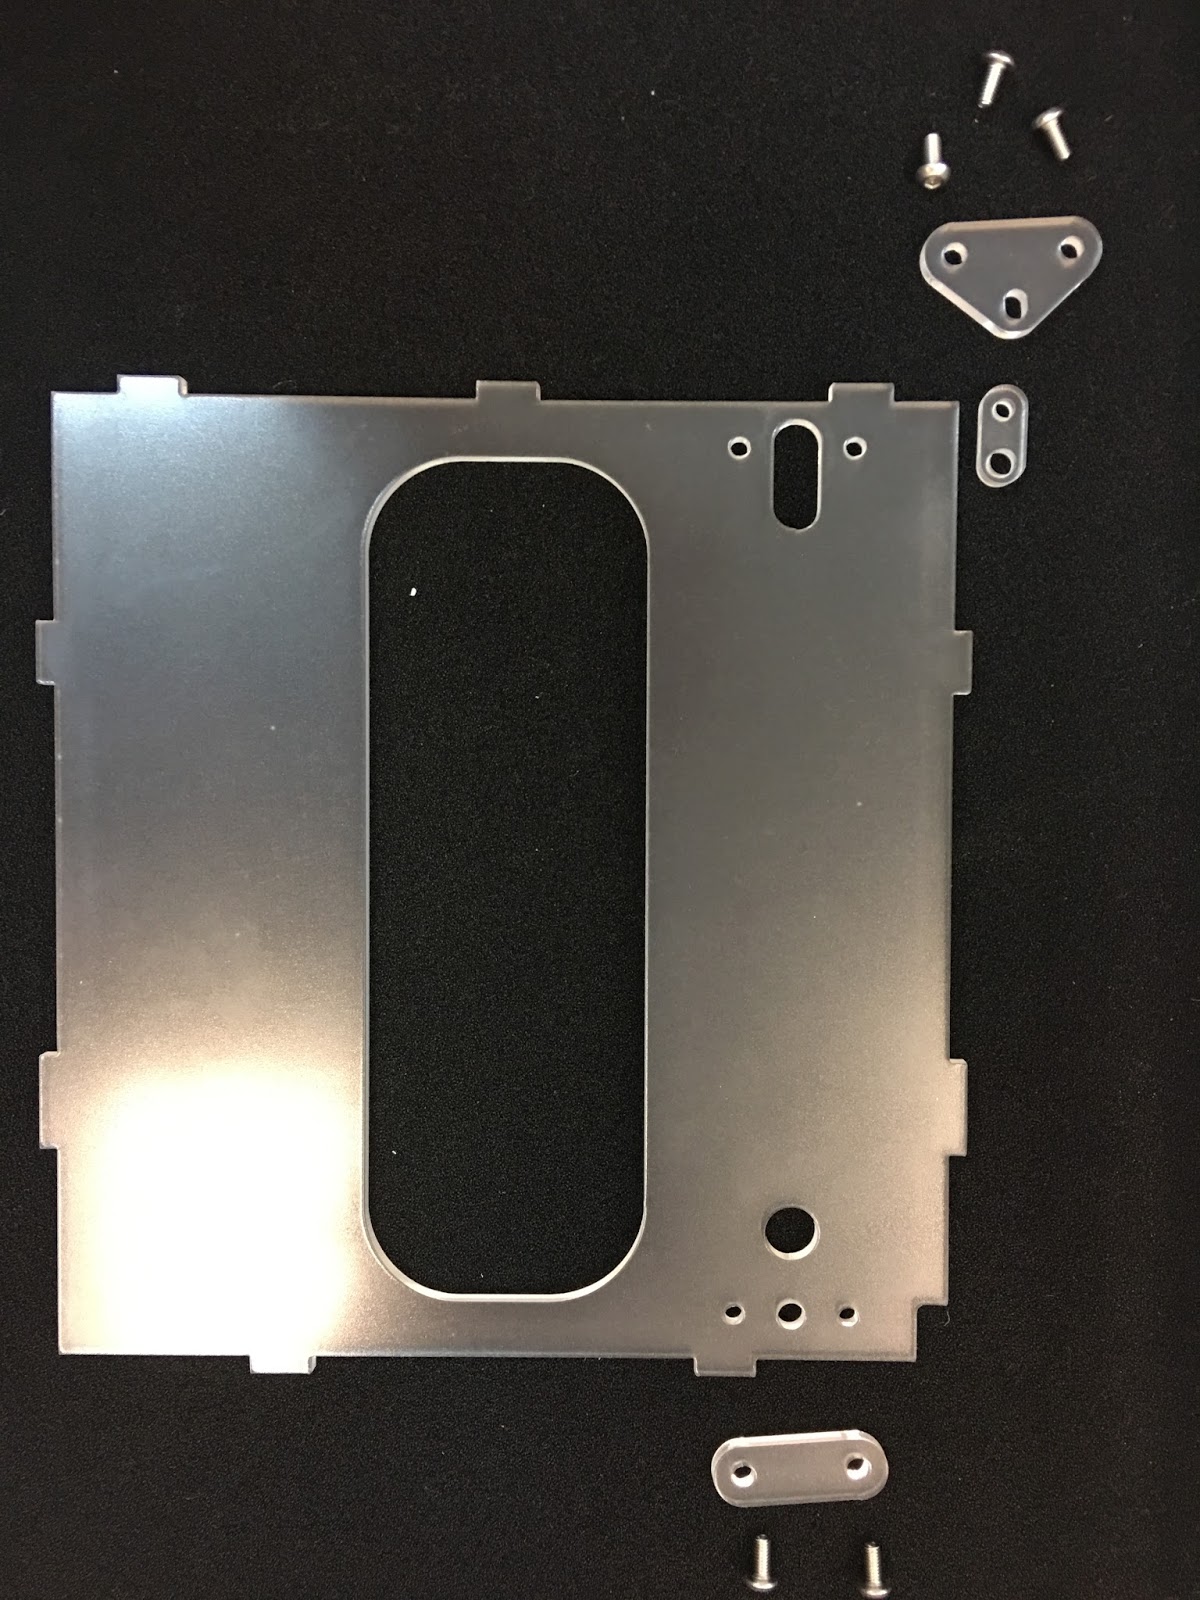
Building the Base

Start to build


The completed base

Building the X-platform


Use the large circle belt
Please put oil on the rods before installing


Follow the middle wire and mark it in black at the end
It is the command earth of X-stop switch and Z-stop switch.


Building the Extruder


When Finished, it looks like the following.


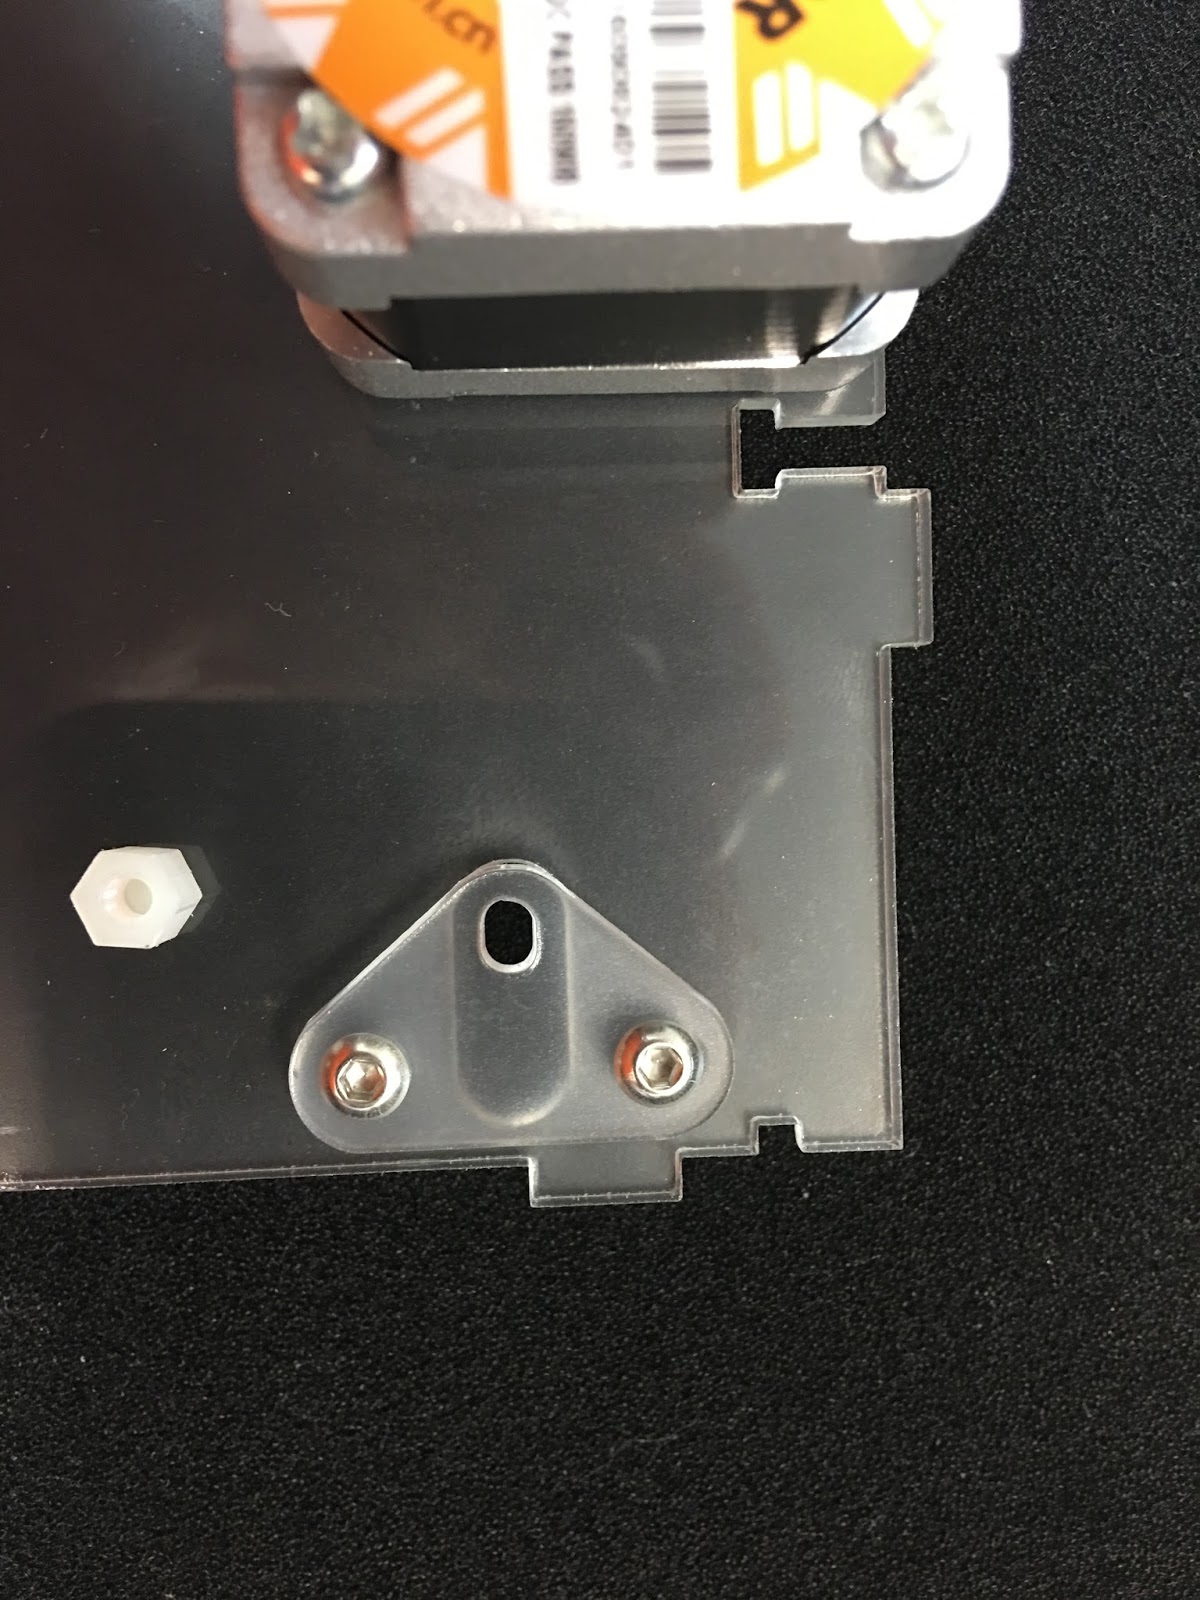
Building the plate with Display & Card Reader
For the TinyBoy 2 J10, it doesn't include the Display & SD card modules, but you can buy the modules separately. If you need the Display & SD card modules, please ask for your suppliers.
Without Display & Card Reader (Default)


With Display & Card Reader


Building the Y-platform


Building the printing head


Working on Assembly 1


Final Result
Working on Assembly 2
Please put oil on the rods before installing


Lift the X-platform to the top


Push the X-platform to the buttom

Turn over the machine


Then Do the free fall testing of the X-platform


Working on Assembly 3

Working on Assembly 4


Please put oil on the rods before installing


Done
Working on Assembly 5


Done
Working on Circuit and wiring

The marked black wire of the X-platfrom has to connect to the black pin of the Y-Stopper.
For the Fan of the Heater, please connect to wire directly to the power socket with the same colour as the diagram shown above.


Done.
Before Using, please goto Here to do 0 level calibration of Z-axis of your machine.
Also, you can goto Here to learn more how to calibrate the machine to get a better printing quality.
Safety First. Please stick the warning signs on the machine to remain people.


nice post ever
ReplyDeleteThe description is really well written. Along with the written description, the pictures give a visual representation make it much easier to follow the steps. Great job done, thank you.
ReplyDeleteYou can latest information regarding and download pdf official available JNVST Hall Ticket 2019 & get other imp details.
ReplyDeleteSenior PUC or 2nd year students can download their II PUC Exam Hall Ticket 2019 from the KAR PUC website as per following steps
ReplyDeleteElectrical and Electronics Engineering: VLSI / Micro Electronics, Electronic design and Technology (Chip Design), Computer science engineering, Digital Electronics, Instrumentation and Controls, Aerospace Engineering and Power System Operation and Control, Power system, Power Electronics using UAN Login.
ReplyDelete