TinyBoy 2 J10 (Beta) Assembly Guide version 0.99.04

Preparation


Please take off the protect stickers.
The sand surfaces are the front of the plates.


We have 3 pack of screws, nuts and washers. The left one is the M3x6mm long screws, the nuts and washers, the middle one is all the other kinds of screws, and the right one is some screws, nuts and parts will use only once.

It is better to set up a good place while building your machine.


The following is the sequence for the machine building.
For the TinyBoy 2 J10 (Bete), it does not include the Display & SD card modules, but you can buy the modules separately. If you need the Display & SD card modules, please ask for your suppliers.


The complete phase x
Phase X complete
ZZZ
Phase 1
Building the Base

Please prepare below for building Phase 1
M3x6mm x 12
M3x18mm x 5
M3 Nuts x 2
M3 washer x 3
Hexagonal copper pillars x 4
Hexagonal plastic pillars x 4
Nylon Washer x 2 (1+1)
Bearing x 2
Y stopper x 1
Y motor x 1
Z motor x 1
Motherboard set x1
XH 2.54 x 1
small round belt x 1
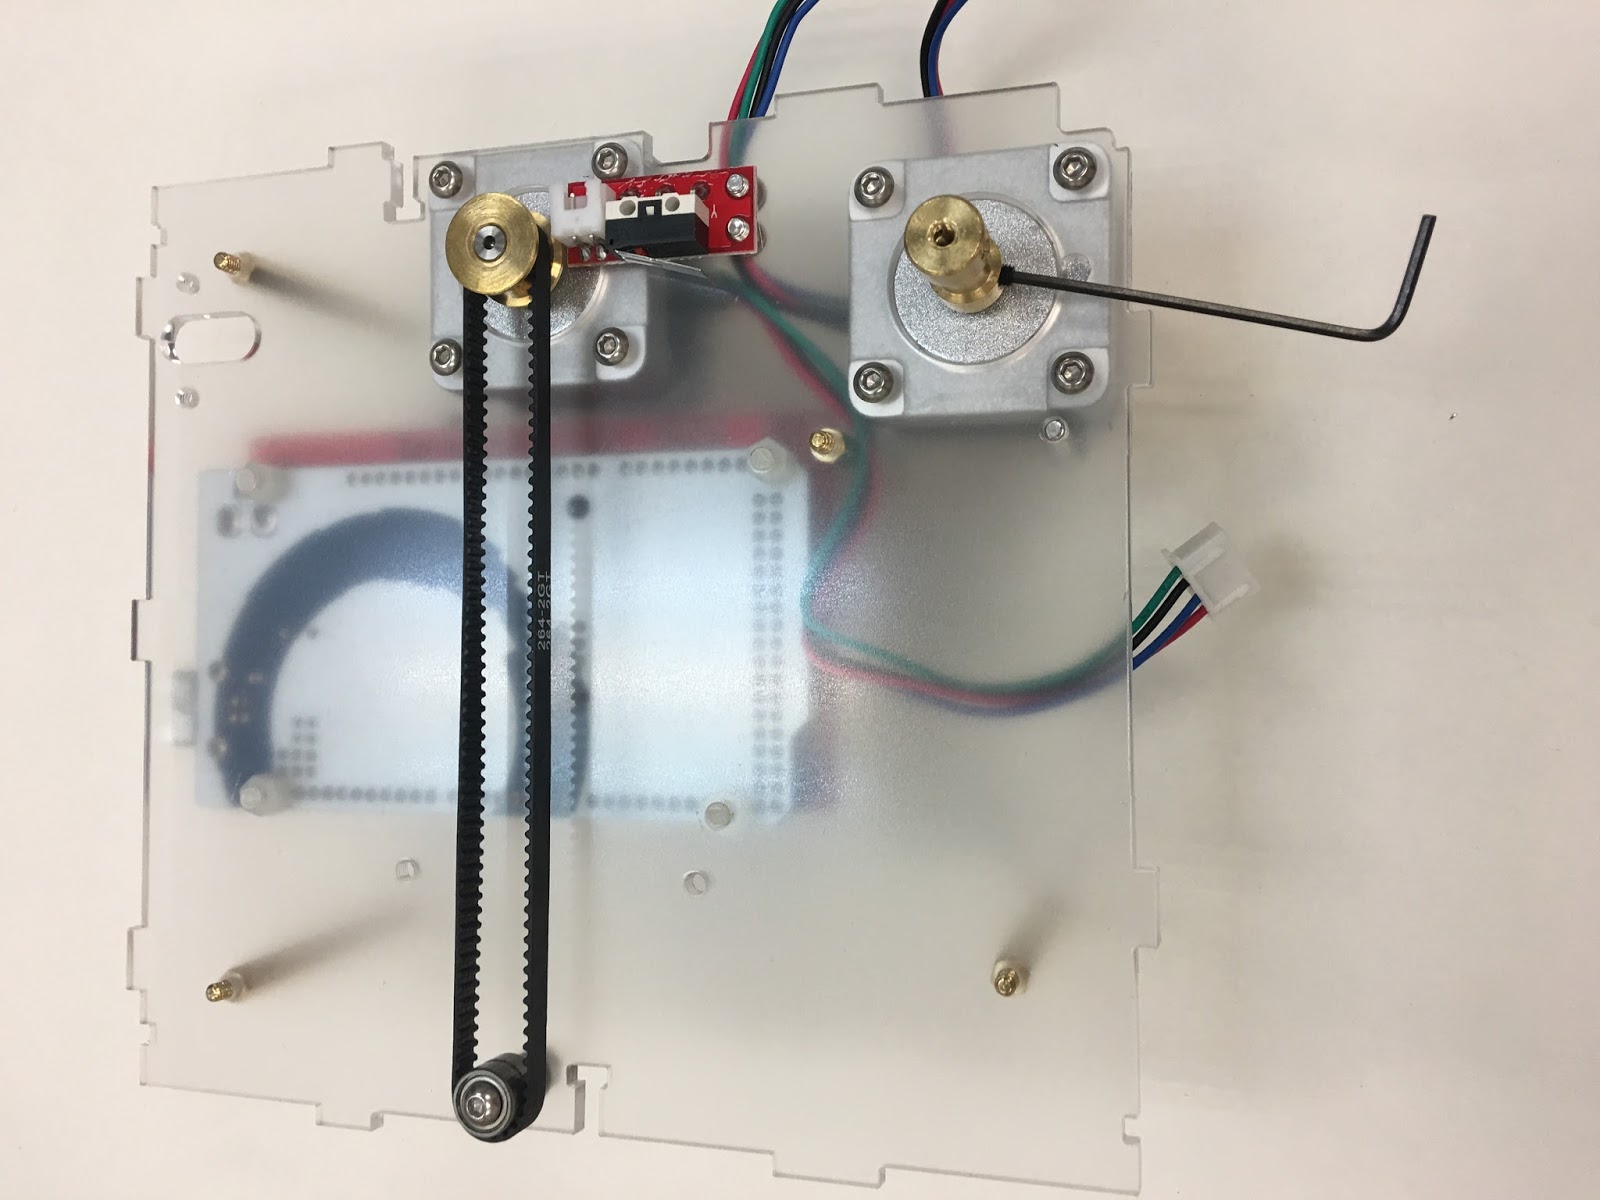
Start to build


 (M3x6mm x2)
 (M3x6mm x 8) (Please mind the wires direction)
 (Hexagonal plastic pillars x 4)
(Hexagonal copper pillars x 4)


use (M3x18mm x 3) to install the mothermoard

 (M3x18mm)


 (M3x18mm x1)
The completed base

Phase 1 completed
Phase 2
Building the X-platform

Please prepare below for building Phase 2
M3x4mm x 2
M3x6mm x 8
M3x18mm x 3
M3 Nuts x 1
M3 washer x 5
Nylon Washer x 3
Bearing x 6
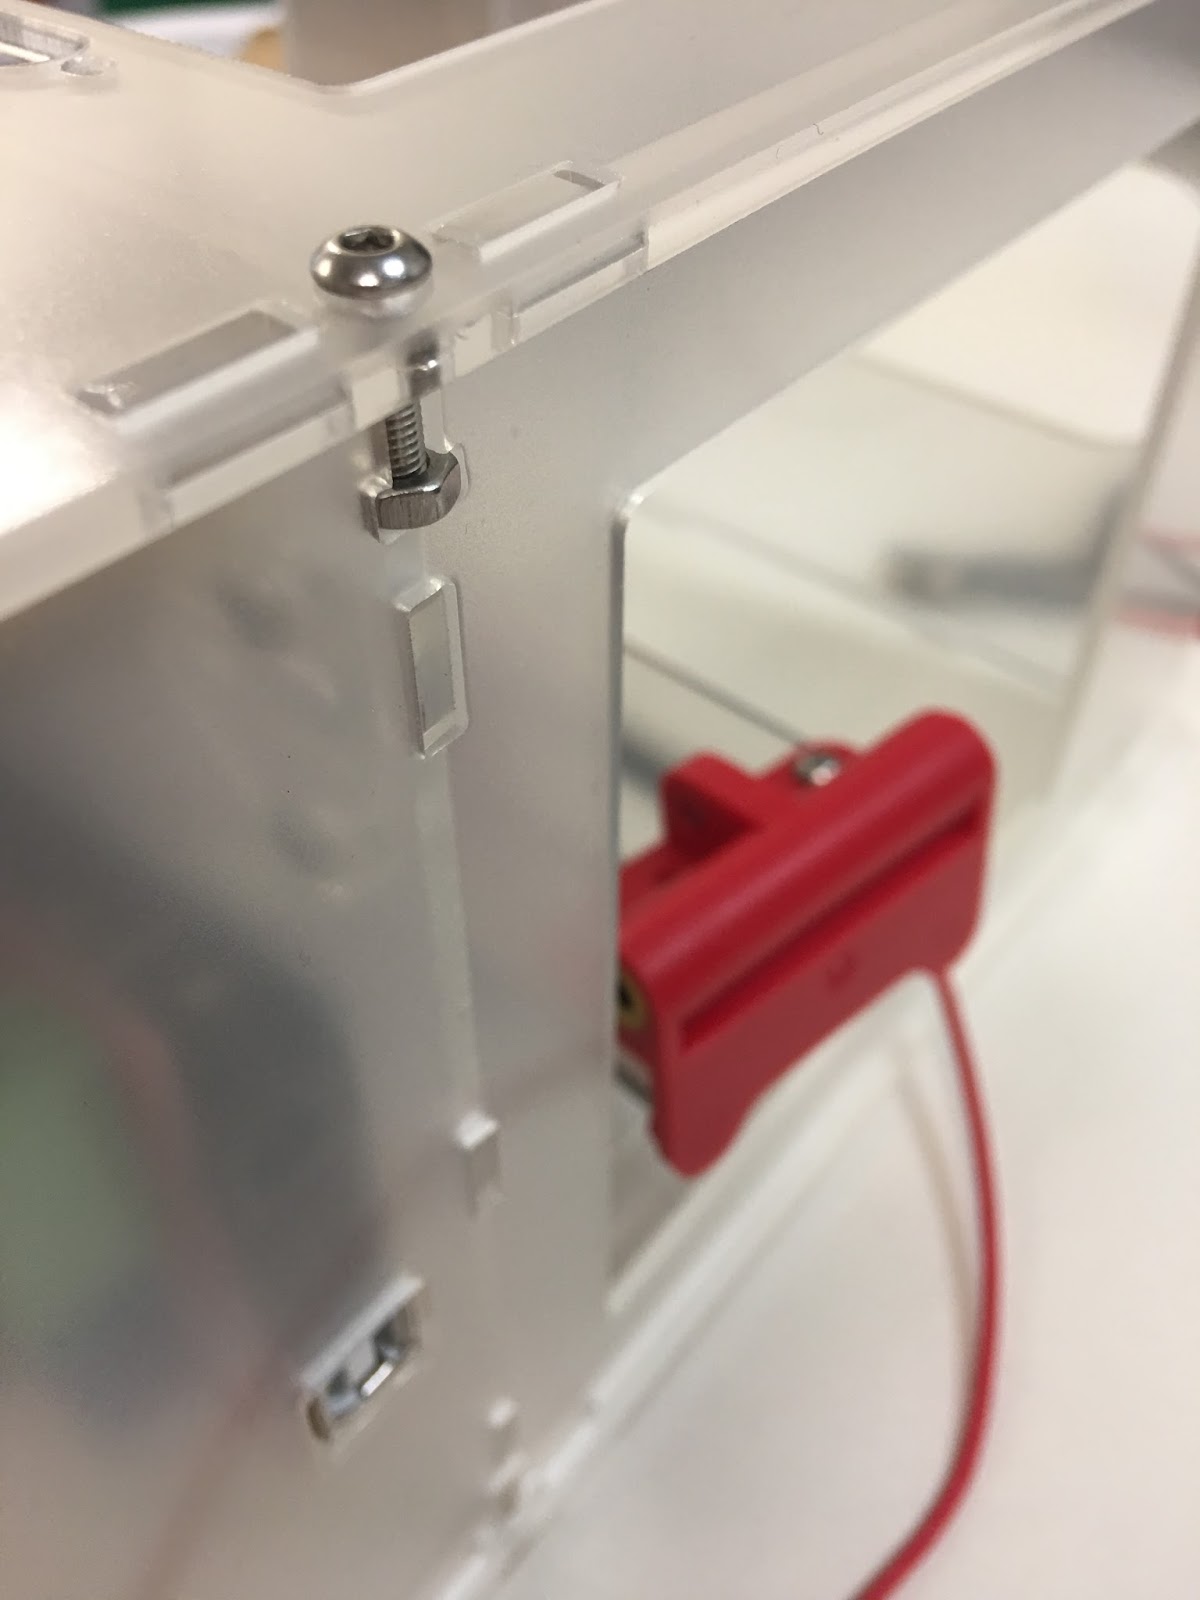
X+Z stopper x 1
X motor x 1
The red parts x 2+1(car)
short axixs x 2
Rould belt x1
 (M3x6mm x 2)
 (M3x4mm x 2)
 (M3x6mm x 4)
-----
 (M3x18mm x 1) for below
-----
 (M3x18mm x 1) for below
-----


 Use the large circle belt
-----
Please put oil on the rods before installing


 (M3x6mm x2)
-----
(M3x18mm x 1) for below


Follow the middle wire and mark it in black at the end
It is the command earth of X-stop switch and Z-stop switch.

The complete X-platform
Phase 2 completed
Phase 3
Building the Extruder side
Please prepare below for building Phase 3
Red Plastic hook x3
M3x6mm x 6
M3x8mm x 1
M3x12mm x 1
M3x18mm x 1
M3x22mm x 2
M4x8mm x 1
Big Bearing x 1
M4x20mm cup head
M5x8mm cup head
Spring x1
M4 washer x1
Extruder motor x1
gold parts x1

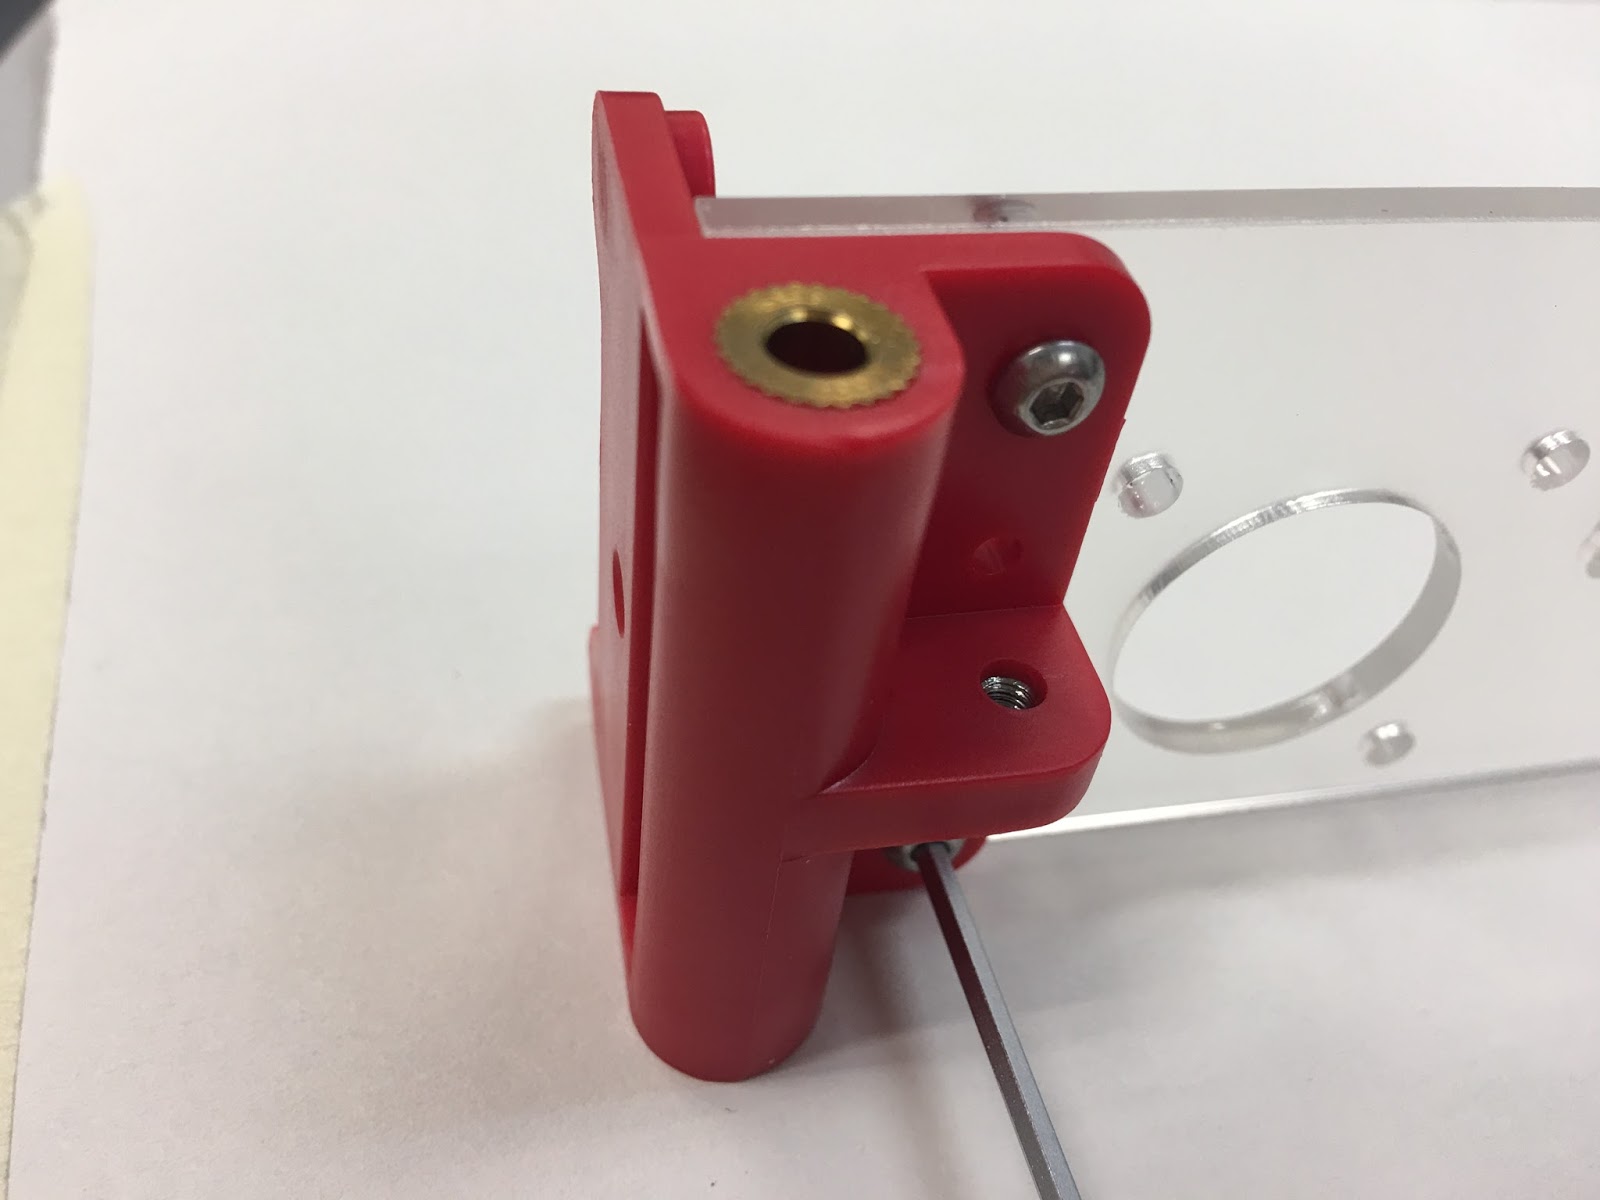
 (M3x12mm x1)
 (M3x22mm x2)(right hand side both corner)
(M3x8mm x1)(top left corner)
 (M3x18mm x1)(lower left corner)
 (M4 nuts x 1)
 (M4x8mm x1)(for bearing)
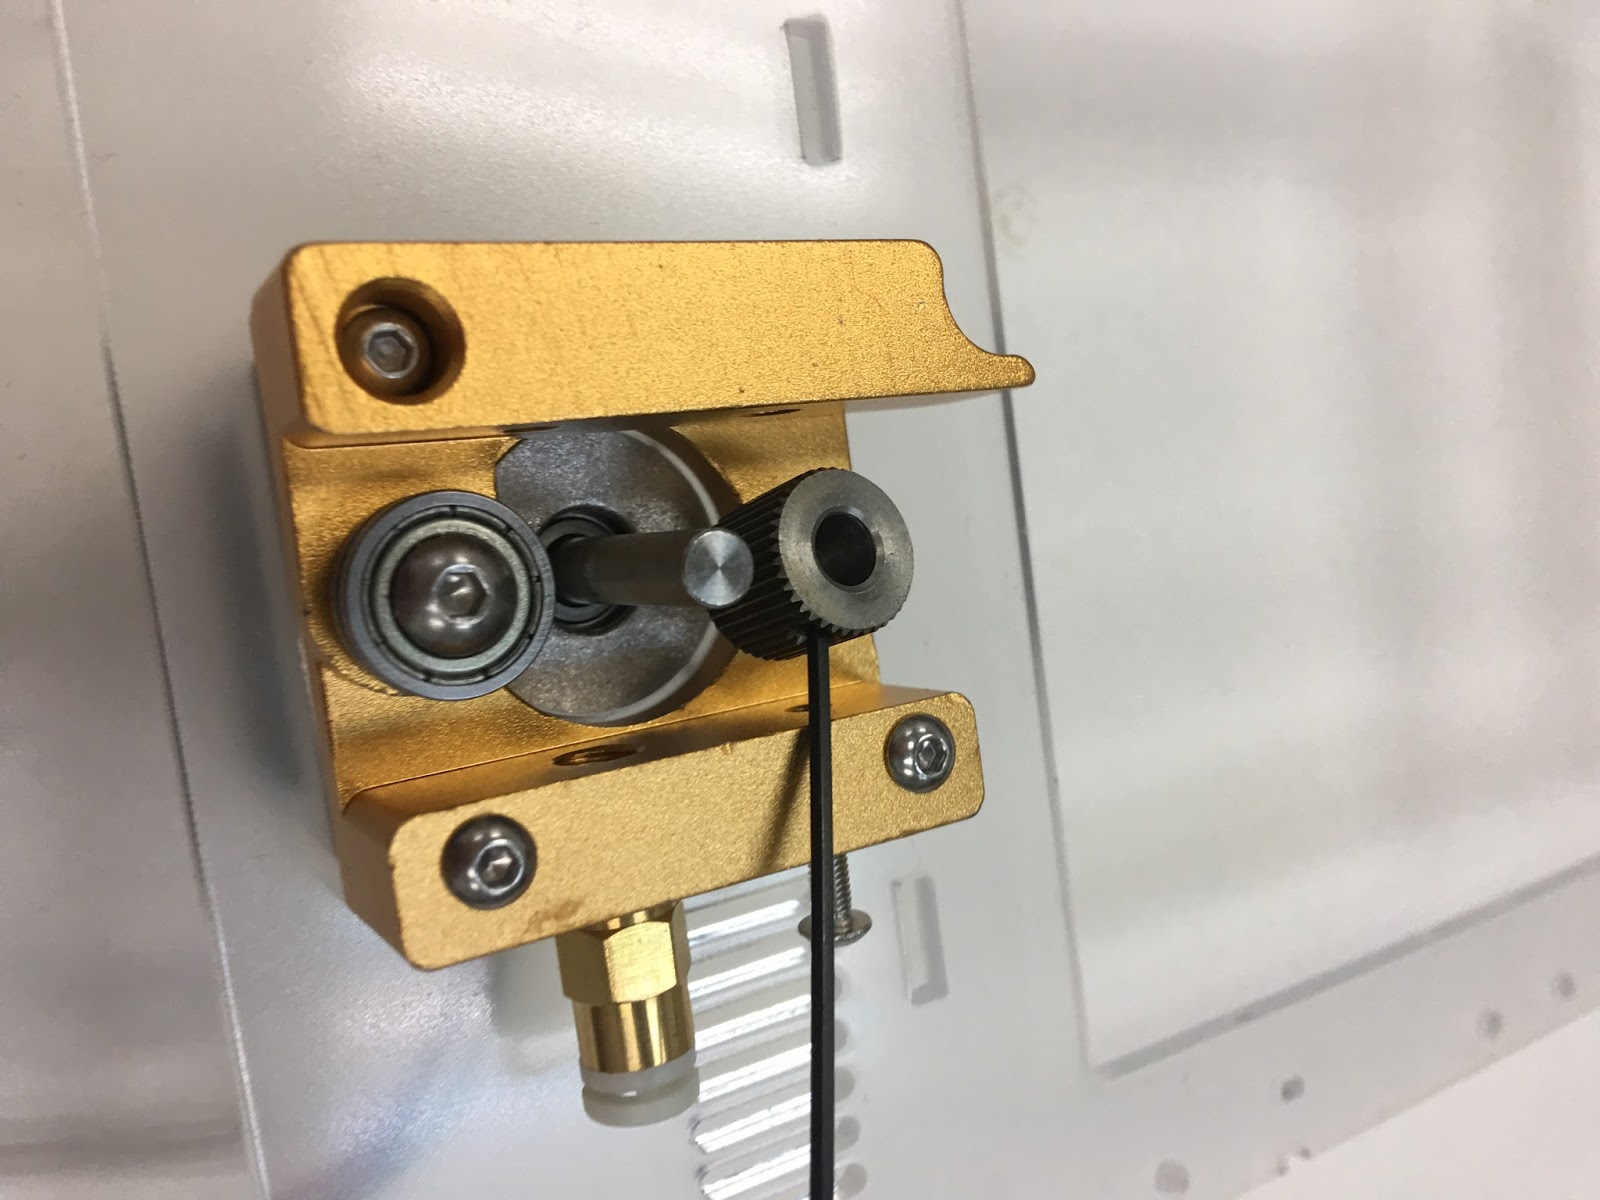


(M4x20mm cup head x1)
(M5x8mm cup head)
(Spring x1)


 (M3x6mm x6)
The complete Extruder side
Phase 3 completed
Phase 4
Building the Front side (Display and card reader modules)
For the TinyBoy 2 J10 (Beta), they do not include the display & card reader modules, they are additional options. If you need the Display & SD card modules, please ask your suppliers for further information.Please prepare below for building Phase 4
M3x8mm x 4
Front side

 (M3x8mm x4)
Front side (with the display and card reader modules)


 (M3x8mm x4)


(M3x8mm x4)
Phase 4 completed
Phase 5
Building the Y-platform
Please prepare below for building Phase 5
M3x6mm x 4
M3 washer x 4

Than build the Y-platform

(M3x6mm x4)
(M3 washer x 4)


The complete Y-platform
Phase 5 complete
Phase 5 complete
Phase 6
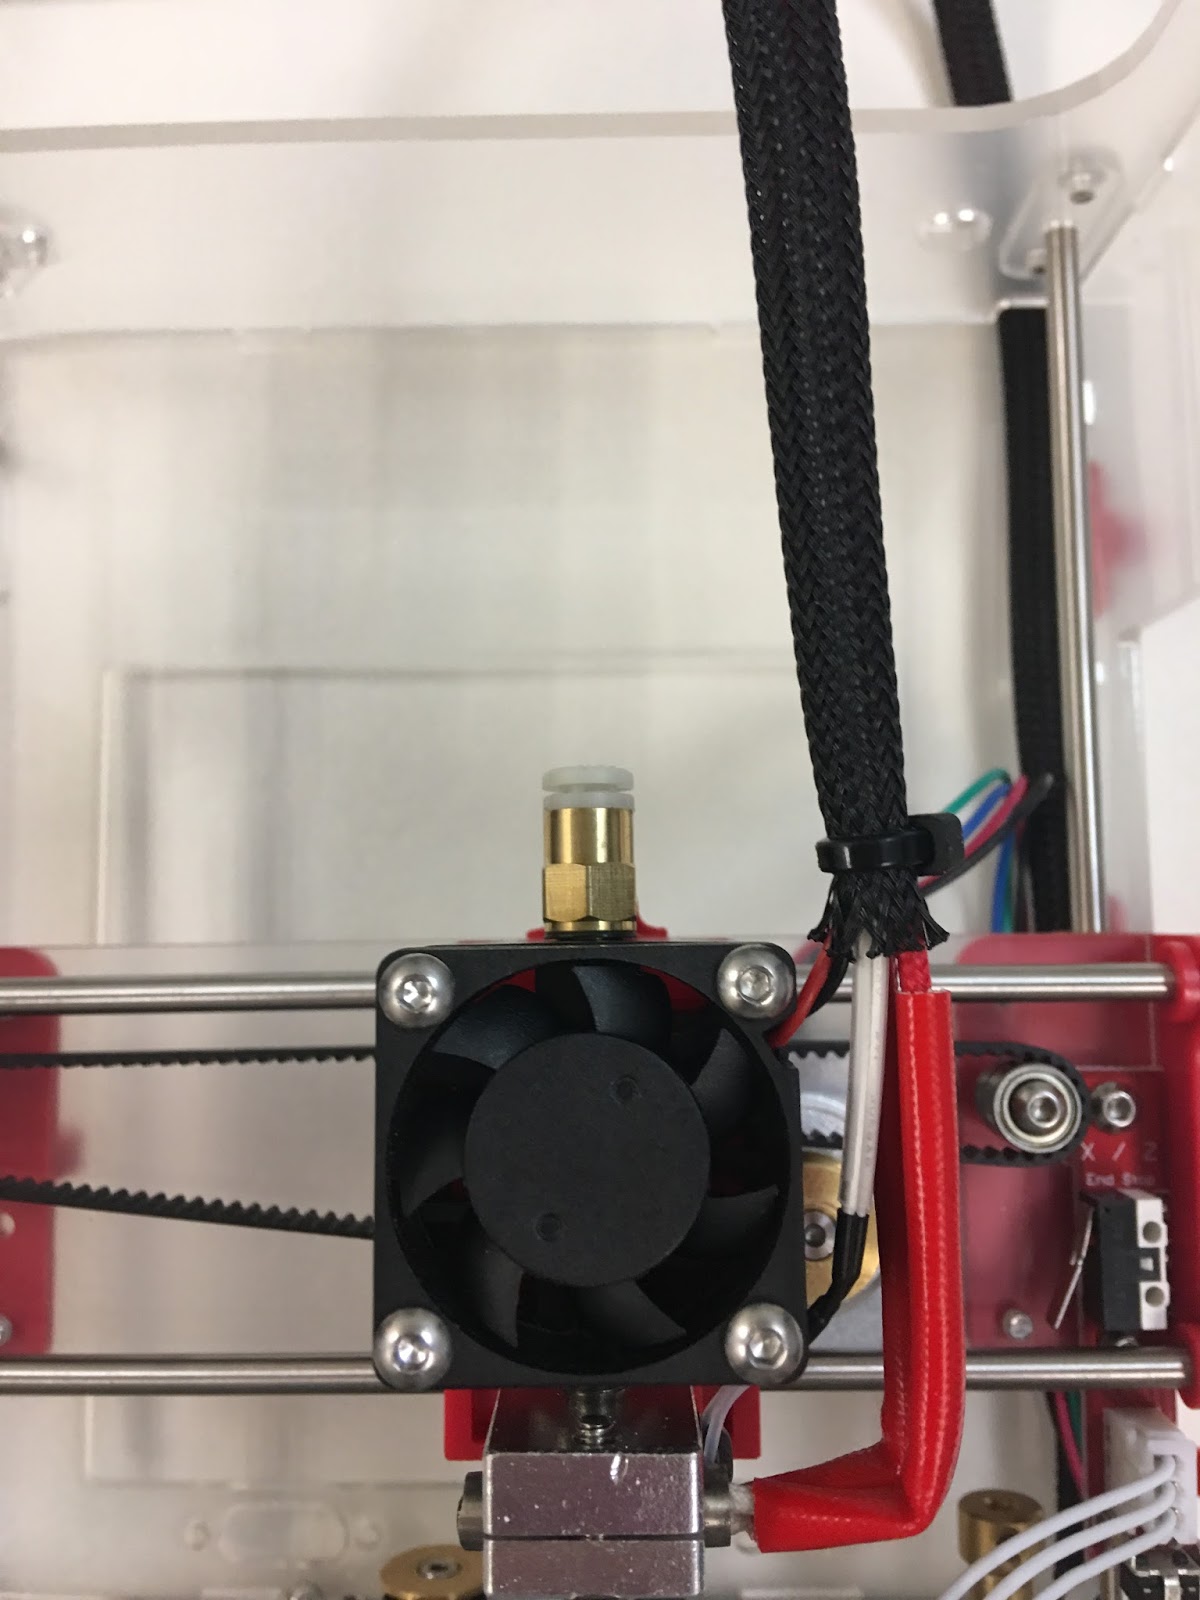
Building the printing head
Please prepare below for building Phase 6
M3x12mm x 1
M3x35mm x 4
heater cable x1
temperature sensor x1
Red (car) x1
Fan x1
E3D + heat sink Module
heater cable x1
temperature sensor x1
Red (car) x1
Fan x1
E3D + heat sink Module

-----
 (M3x35mm x4)
 (M3x12mm) to replace the black one

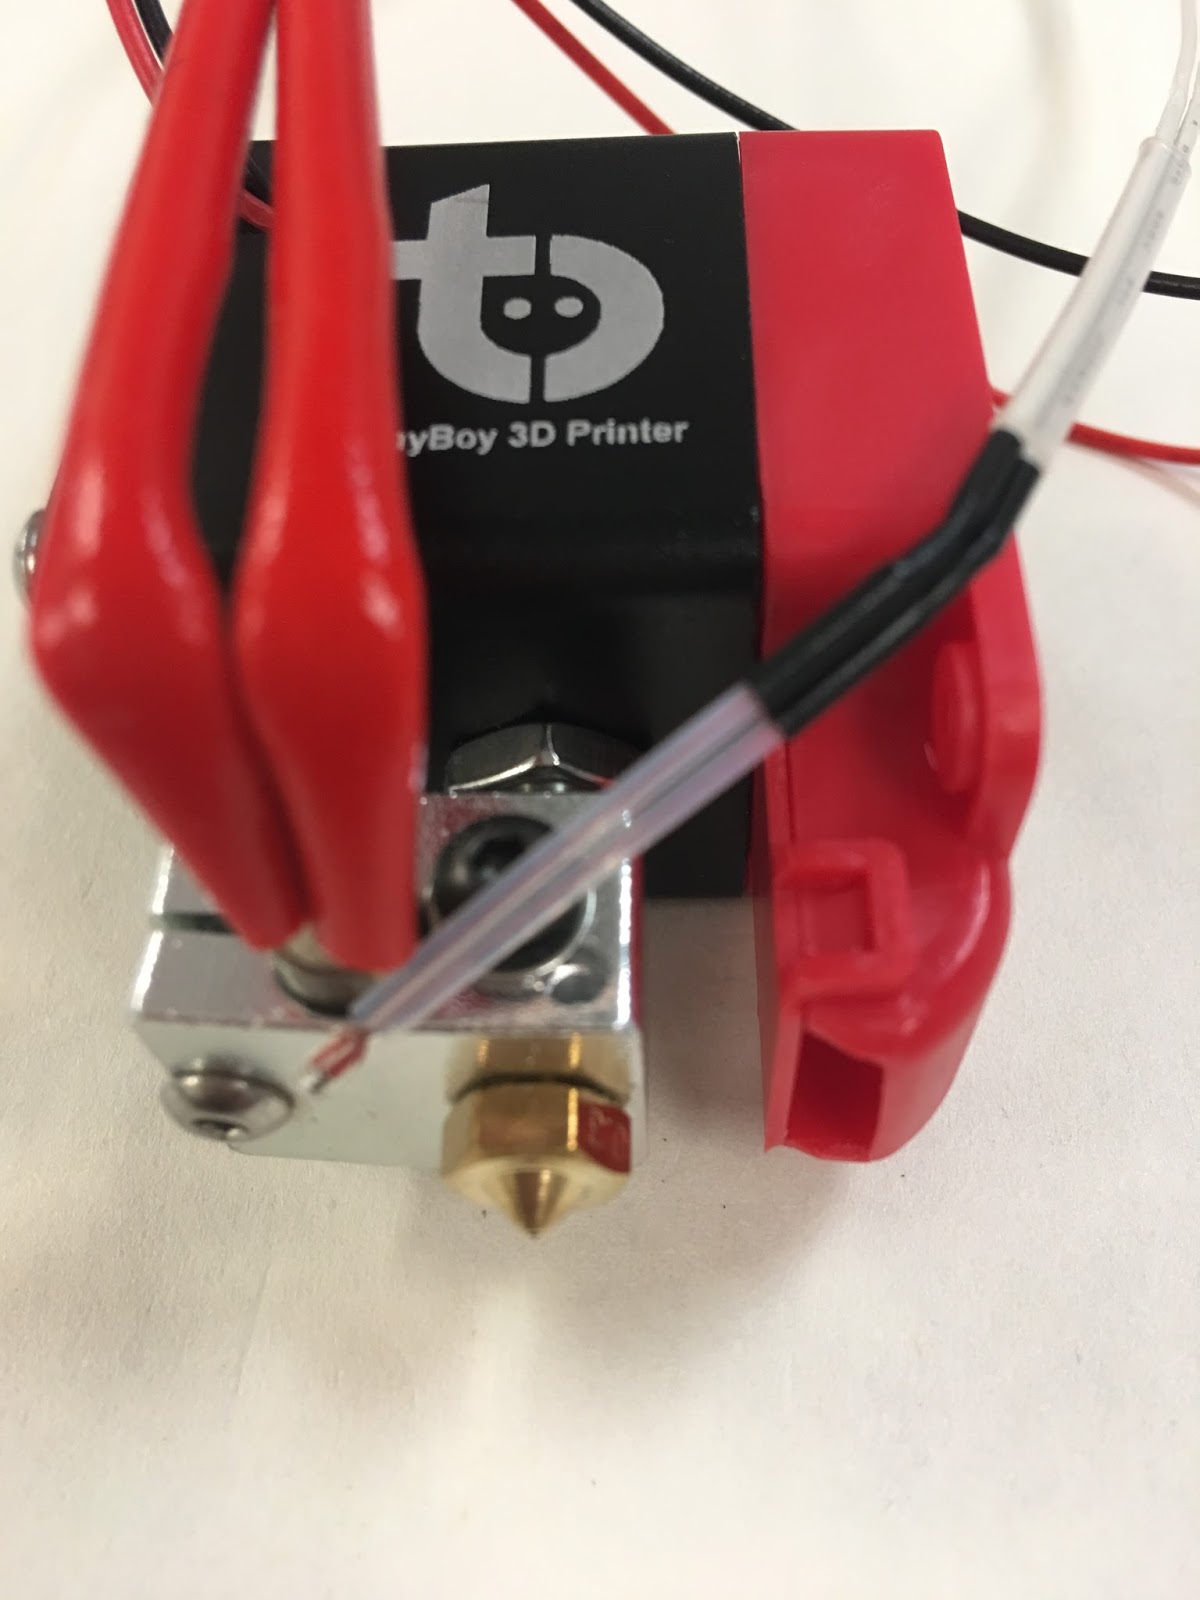


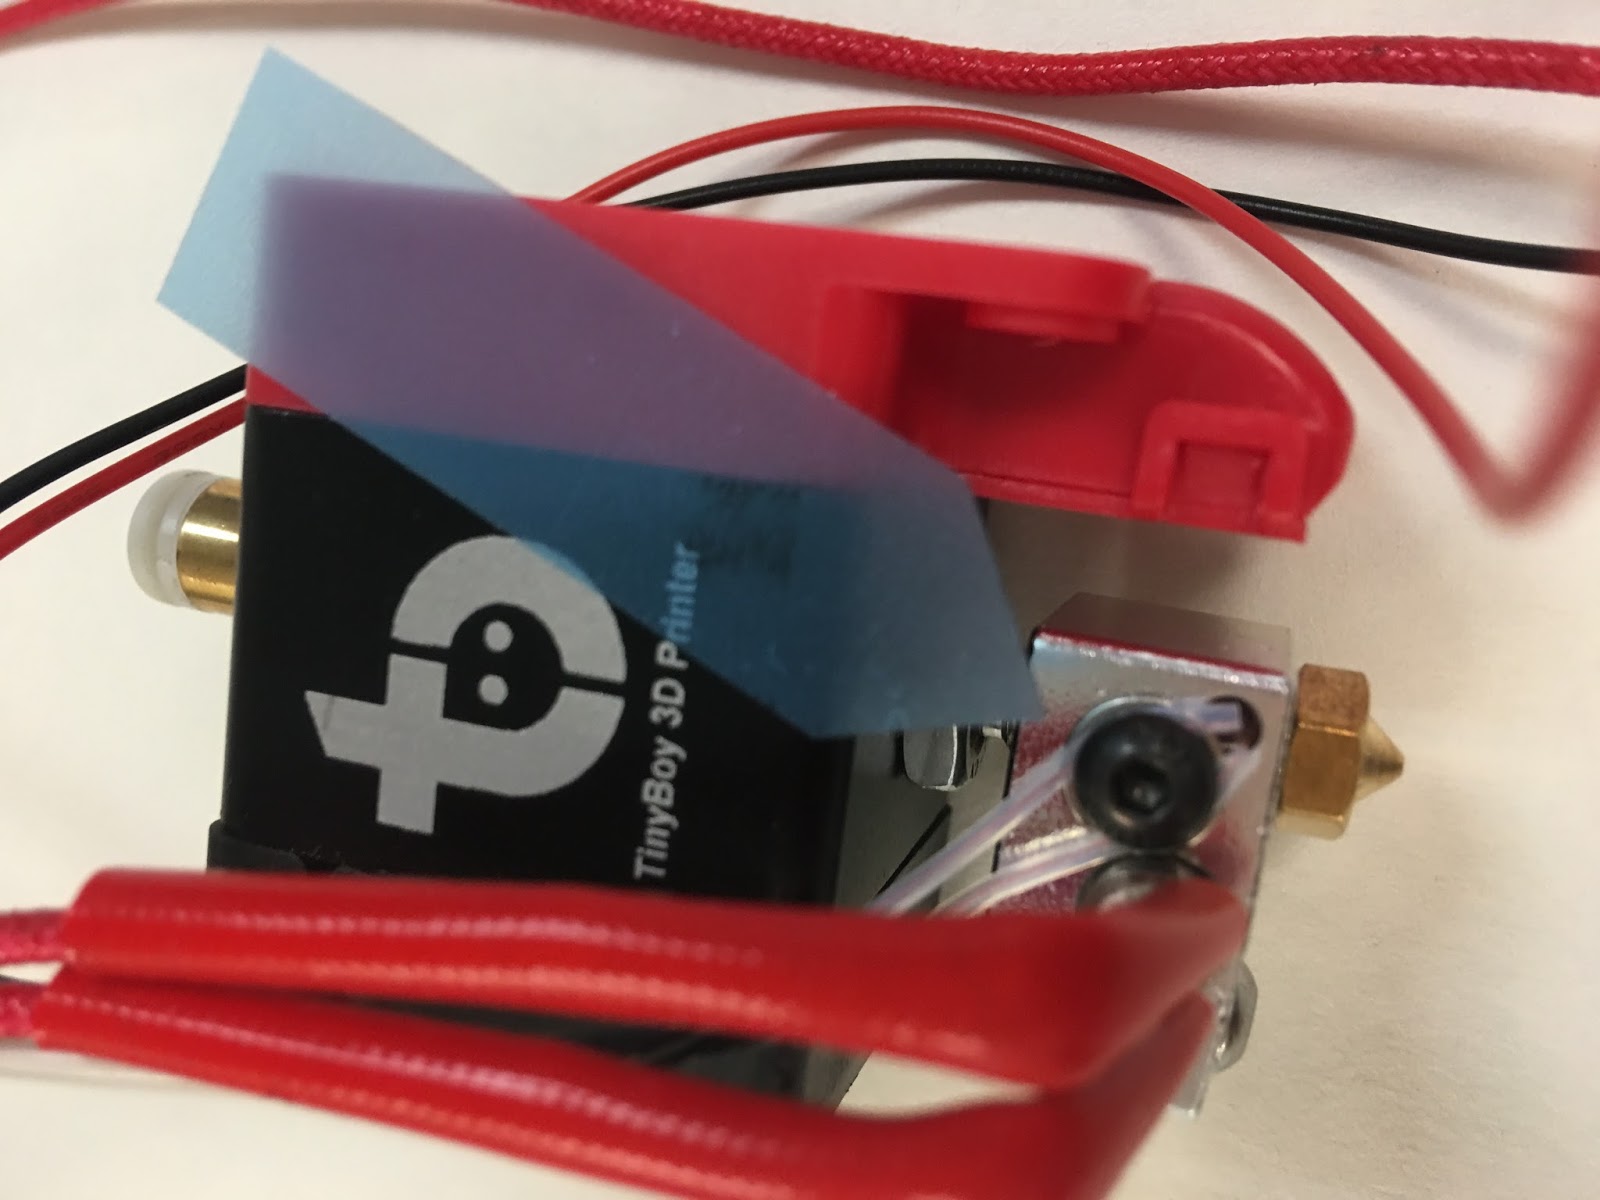


The complete phase 6
phase 6 complete
Phase 7
Working


Phase 8
Working the Assembly 1 join to box shape
Please prepare below for Phase 7
M3x12mm x 10
M3x6mm x3
M3x6mm x3
M3 Nuts x 10
M3x6mm x6
long axixs x 2
M3x6mm x6
long axixs x 2
start to join to box shape
M3x6mm x5


(M3x12mm x 5)
(M3 Nuts x 5)

prepare install the Y axis and x platform


 (M3x6mm x3)

Phase 8
Working the Assembly 2 install Z axixs
Please prepare below for Phase 8
M3x6mm x 10
Nylon Washer x 1
Bearing x 1
Please put oil on the rods before installing


 Bearling
 screw shaft


 Lift the X-platform to the top
 Push the X-platform to the bottom
, do the free fall test


Phase 9
Working the Assembly 3 install Y axixs
Please prepare below for Phase 9
M3x6mm x 10
short axis x2


short axis x2


Please put oil on the rods before installing


Done
Phase 10
Working the Assembly 4 printing head join to x
Please prepare below for Phase 10


Done
Phase 11 wires join
Working on Circuit and wiring


The marked black wire of the X-platfrom has to connect to the black pin of the Y-Stopper.
For the Fan of the Heater, please connect to wire directly to the power socket with the same colour as the diagram shown above.

Done.
Before Using, please goto Here to do 0 level calibration of Z-axis of your machine.
Also, you can goto Here to learn more how to calibrate the machine to get a better printing quality.
Phase 12 labeling
Safety First. Please stick the warning signs on the machine to remain people.


The ardent Programming Homework Help tutor that nailed down my project was very passionate. He answered my Python questions with long, self-explanatory solutions that make it easy for any average student to revise. Moreover, he didn't hesitate to answer other questions, too, even though they weren't part of the exam. If all Python Homework Help experts can be like this then they can trend as the best Programming school ever
ReplyDeleteThanks for sharing. These are great combination of beautiful stones. I really love this stone from thegreencrystal, and my sister, she totally liked it it is worth the price.
ReplyDeleteWriting a research proposal is way more than just picking a topic and typing it out. You have to define a problem, review existing literature, build a methodology, and make it all sound convincing. I used to get totally stuck at the literature review stage or couldn’t figure out how to connect my objectives to the research questions. That’s when I tried getting research proposal assignment help, and honestly, it gave me so much clarity. The structure, flow, and academic tone all improved, and I finally felt confident submitting my work. It’s a great option if you're unsure where to start or how to polish your draft
ReplyDeleteChoosing acv tablets for weight lossover chemical supplements is a healthier and more sustainable approach to managing your body fat.
ReplyDeleteFor anyone struggling with tricky projects, Business Assignment Writing Service offering expert guidance and solutions makes the process much simpler. With well-researched and customized content, students can submit assignments confidently. It covers essential areas of business studies such as strategy, economics, and organizational behavior. Users can benefit from step-by-step explanations, reference management, and accurate formatting. The platform also ensures timely delivery and revision support if needed. By leveraging this service, learners not only save time but also understand difficult concepts more effectively, helping them to score better grades while maintaining academic integrity throughout their work.
ReplyDeleteStudying in Glasgow comes with its own set of academic pressures, and managing multiple assignments simultaneously can feel overwhelming. Whether you are at the University of Glasgow, Strathclyde, or any other institution, getting reliable assignment help in Glasgow can truly make a difference. From essays and dissertations to case studies and reports, professional support ensures you submit high-quality work on time. With expert guidance tailored to UK academic standards, students can improve their understanding and boost their grades confidently.
ReplyDelete